0条评论
PCBask网站,致力于提供PCB行业资讯、问答、分享!
PCB问网
【转贴整理】批处理应用举例: the Smart Edit dialog for the Strin
2014-11-05 16:54发布
本帖最后由 wanghanq 于 2014-11-5 17:01 编辑
特注:精华 为opchywen 而设
****************************************
看到网友的帖子:
原理图中,选中多个网络标号 INspector 里text 的smart Edit
http://www.eda365.com/forum.php?mod=viewthread&tid=102641&fromuid=4169
因内容包含图片(不想被论坛再编辑破坏),将此话题新开贴发到这里供网友参考。
网友原贴地址:
把原理图和PCB复制元件和封装到库的一些技巧(以抄OK6410的底座封装为例)2012-08-20 09:30
http://blog.csdn.net/opchywen/article/details/7884504
opchywen嵌入式探索的经验技巧分享--一个宁愿花更多的时间来发现技巧、寻找规律,也不喜欢意蛮干的人!!!
今天 在飞凌官网下载了OK6410的原理图和PCB,如果想做一块Mini的底板。如何能最快地利用上飞凌原来画好的板,是我想解决的问题。
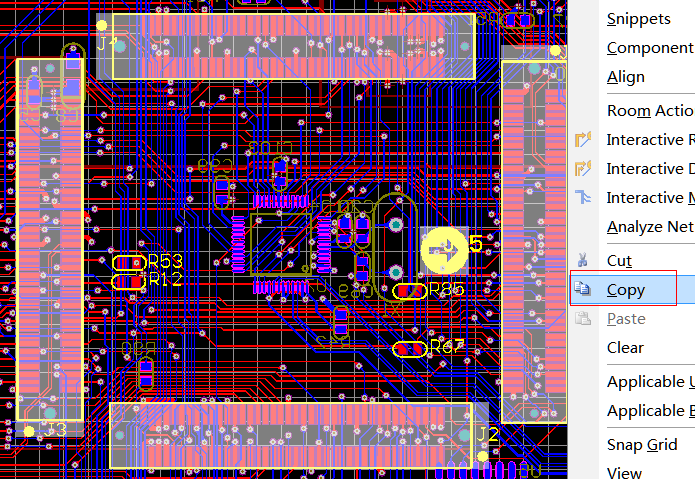
1、首先,把飞凌官方的底板座复制下来,见下图:
特注:精华 为opchywen 而设
****************************************
看到网友的帖子:
原理图中,选中多个网络标号 INspector 里text 的smart Edit
http://www.eda365.com/forum.php?mod=viewthread&tid=102641&fromuid=4169
因内容包含图片(不想被论坛再编辑破坏),将此话题新开贴发到这里供网友参考。
网友原贴地址:
把原理图和PCB复制元件和封装到库的一些技巧(以抄OK6410的底座封装为例)2012-08-20 09:30
http://blog.csdn.net/opchywen/article/details/7884504
opchywen嵌入式探索的经验技巧分享--一个宁愿花更多的时间来发现技巧、寻找规律,也不喜欢意蛮干的人!!!
今天 在飞凌官网下载了OK6410的原理图和PCB,如果想做一块Mini的底板。如何能最快地利用上飞凌原来画好的板,是我想解决的问题。
1、首先,把飞凌官方的底板座复制下来,见下图:
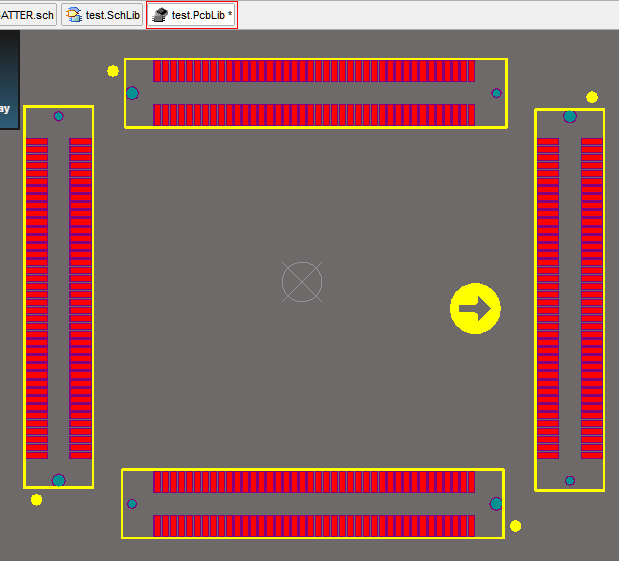
2、切换到PCB库,粘贴(注意,要在编辑区粘贴,不要在PCB LIBRARY那里粘贴,如果在那里粘贴的话会分开成5个封装的。)效果见下图:
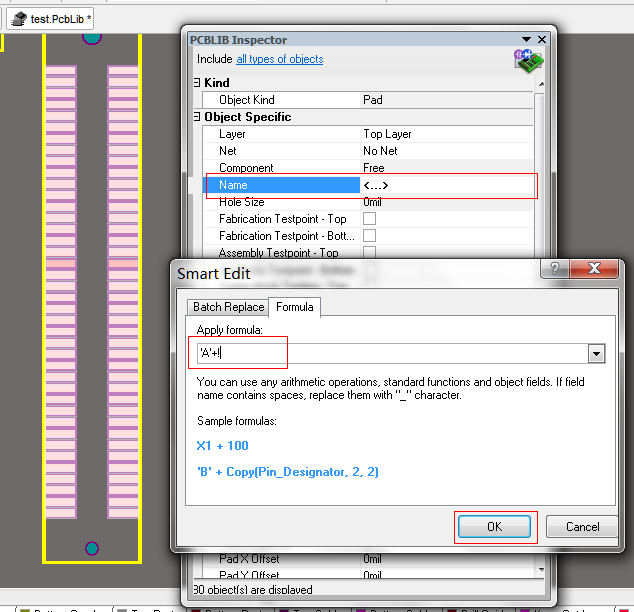
3、现在放大你会发现,那四个底座引脚的名称都是从1到80,这样元件库跟封装是对应不起来的。所以可以想个方法把那四个座的数字前分别加上ABCD。一个一个地改,这不是我风格,呵呵!探索开始了。。。还是直接贴结果吧,过程现在不重要,哈。
在
发现有一段是这样写的:
Formula Tab
This tab provides for more advanced modification, allowing you to apply a specific expression to the selected string objects. The expression can include any built-in arithmetic operators and functions that apply to strings (found in Pascal). Once again, if you wish to use the current value for the attribute as part of the expression, you will need to make reference to this original value, either by using the full name of the attribute, or by using the exclamation character (the supported substitute for the name of the attribute currently being modified). When using attribute names, if any names contain spaces, these must be replaced by the underscore character. So, for example, use of the Component Comment field within a formula should be entered as Component_Comment.
Consider for example three selected memory components specified in a design, with designators U1, U3 and U5. You might want to extend the designators of these components by including some indication of their role. Using the addition operator, you could write an expression to add to the existing string value of theName attribute. This would take the existing (original) string value and concatenate it with a specified new string, as illustrated below:
Name + \\\'_MEM\\\'
or, in shortened form:
! + \\\'_MEM\\\'
Note that the spaces are optional. When you press ENTER the designators of the components will be updated to U1_MEM, U3_MEM and U5_MEM respectively.
To illustrate the use of string-based functions consider the Copy function, which can be used to take a portion of an original string and place it within an expression to create a new string. Take again the Comms Port example (see Batch Replacement of String-based Attributes), where strings of the form CommPortx_8 need to be changed to IOPortx_32. In this case you could select the four free string objects, access the Smart Edit dialog for the String attribute and write the following expression on the Formula tab:
\\\'IO\\\' + Copy(String,5,6) + \\\'32\\\'
or, in shortened form:
\\\'IO\\\' + Copy(!,5,6) + \\\'32\\\'
4、下面再看一下怎么创建一个原理图库与之相对应:
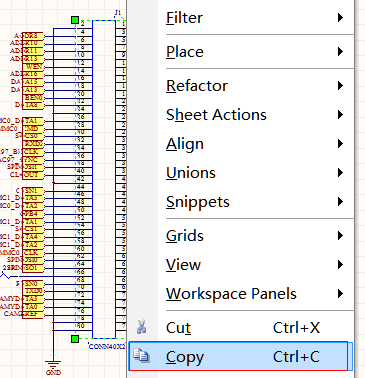
打开飞凌的原理图,把那个元件复制一下,如下图:
转到原理图库,在SCH Library 那里粘贴,注意,在编辑区域是粘贴不了的。
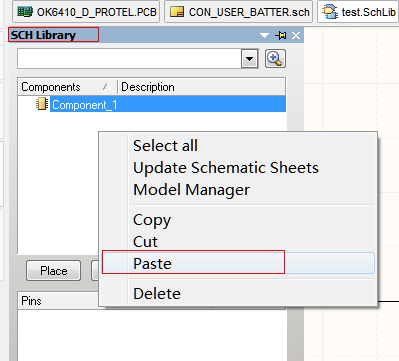
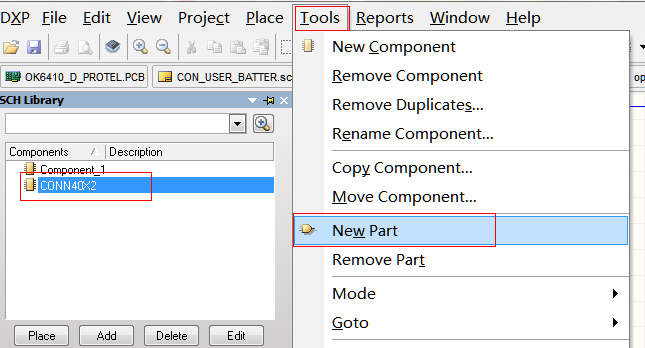
由于人们复制的封装有四个底座,所以建四个部分,见下图:
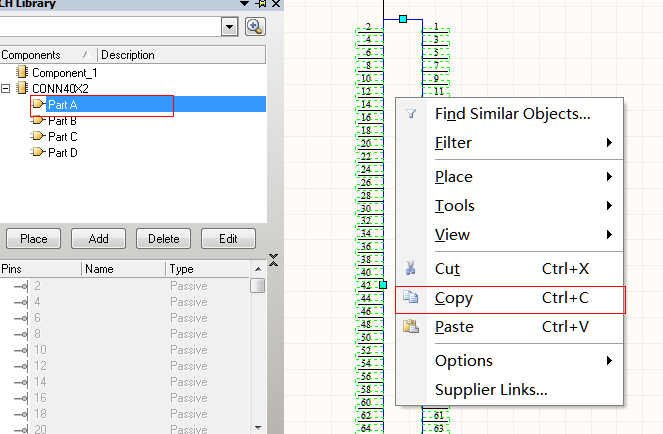
然后选中选一部分,把那元件复制一下,见下图,然后粘贴到其它三部分:
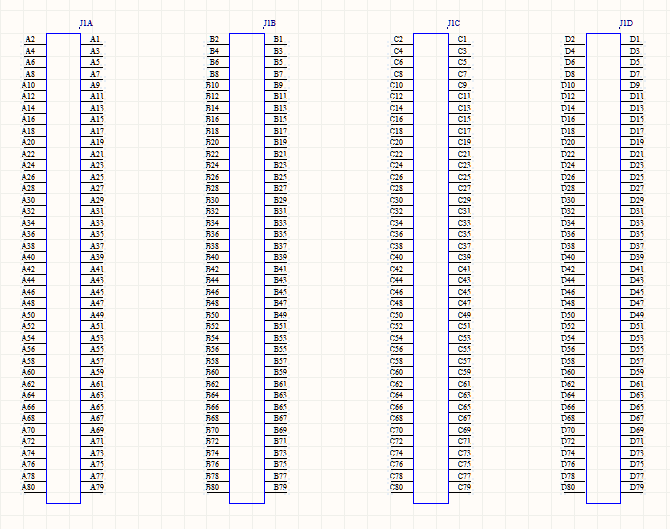
接下来改一下元件的引脚名称与封装相对应就行了,改的原理跟改PCB的差不多,见下图:然后把其它的也改一下。。。

在原理图里放元件的效果图:
上面只是演示了一个抄原理图封装的一些技巧...